Give your barbecue a new lease of life for the upcoming warmer months.
With spring just around the corner, now is the perfect time to prepare your Outback® gas BBQ. Whether you’ve had it covered over the winter or used it to cook your Christmas turkey, keeping up with barbecue cleaning is the best way to preserve the authentic charcoal flavours you’re after.
No matter the state of your barbecue, you’ll need to give it an overall clean and conduct some technical checks before bringing it out of the depths of your shed for regular use.
Using customer feedback and common barbecue mishaps, this article will discuss everything you can do to prepare for BBQ season including a step-by-step guide.
So, What Tools Do You Need?
This checklist is everything you’ll need for your barbecue MOT.
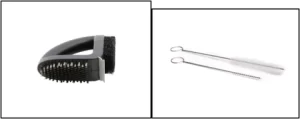
- 18’’BBQ brush – (OUT370715)
- Stainless steel wool
- Two-piece brush set – (OUT371012)
- Grill Brush – (OUT370188)
- Play Sand x 2kg
- Aluminium foil
- Vegetable oil
The BBQ Base
et’s start with the outside. The exterior of an Outback BBQ is made from porcelain enamel to protect it from rusting. This means it’ll only need to be cleaned with a cloth and hot soapy water.
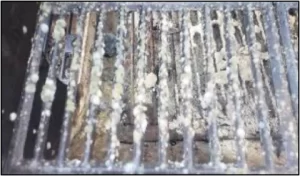
Inside the hood of your gas BBQ you’ll find a protective sheet of aluminium designed to retain heat and prevent the porcelain enamel discolouring due to excessive heat. This part of the barbecue will require more ‘elbow grease’ to remove any burnt-on grease. Don’t worry too much about trying to achieve a perfectly clean surface as it will easily become discoloured again during the first cooking session.
The next item to focus on, and probably the most important, are the grills or hot plates. Outback® grills are mostly made with cast iron and a porcelain enamel coating. Although the porcelain enamel will protect the surface it may still chip or be scrapped off after a period of time, leaving your grills looking a bit unhealthy when you first open the hood.
We do not recommend placing the grills in a dishwasher as they are heavy and may damage other items, plus cleaning fluids will damage the cooking surface.
Step One – Scrub and Soak Those Grills
Use the Outback® 18” grill brush to remove all the excess grease and mould. Lift off the grills and place into an appropriately sized container of warm soapy water to soak.
Step Two – Clean the Vapour Bars
Remove the Flame Tamers from underneath the grills and use stainless-steel wire wool to remove any excess grease or debris from the top and underside of each bar.
Depending on when they were last cleaned, this may take some time. Once you have removed all the grease, place in the same container as grills to soak. If the Flame Tamers need replacing, please select the correct part from the spare parts section on our website.
Step Three – Test the Burners
A major cause of burners failing to ignite can be caused by insects overwintering or nesting during the winter months inside the burners or pilot tubes. It only takes a small amount of debris to block the burners to prevent ignition.
First, you need to eliminate any factors that may also prevent the burners from working efficiently.
To do this, check the gas is flowing to the burners by attaching the regulator to the gas cylinder. Turn on the gas and check the burners ignite using the ignition or push-button ignitor on your gas BBQ.
If they fail to ignite using the ignition, light with a long match manually. If the burners do not light manually there may be a problem with the regulator or hose, preventing gas reaching the burners. In either case, the regulator will need to be checked and potentially replaced.
If you can hear or smell the gas but they are still not igniting, or one or more of the burners fail to ignite, the burner may be blocked. Always disconnect the gas when it’s not in use.
To unblock the burners: remove the burners by unscrewing the screw located on the top of the cross-channel bars and the two screws positioned at the rear of the BBQ body, holding the burner in place. The burner will then slide off the gas valve.
The burners or gas ports (holes along the side of the burner) may be blocked. To unblock it, you will need to use the Outback® Two Piece Brush Set (OUT371012). Push the larger of the two brushes into the burner and push back and forth removing any debris or blockage, then lightly clean the gas port holes using the Outback® 3-in 1 Barbecue Cleaner (OUT370174).
If you can ignite them manually, that means the gas is flowing correctly and the fault is most likely the ignition. Check you can see a spark from the electrode, if no spark is present remove the ignition and ignition wire and check for any debris or damage. You may need to replace the ignitor and electrode wire.
Step Four – Drip Tray
Cleaning and maintaining your drip tray will prolong the life of your burners and more importantly prevent fat fires. Remove and replace any sand.
The most important part of the process is remembering to put a layer of kitchen foil and sharp sand into the tray at the beginning of every season and check every few months. If the tray has rust holes, visit our website and replace with a replacement tray.
Other parts may also need to be checked and replaced, if you have any problems identifying the correct part contact us at [email protected] and we will be happy to help.
Final Step – Test Leak
Finally, carry out a leak test before using your gas BBQ and whenever you replace a gas part, you will find advice on how to undertake the leak test in our instruction manual, online or via your local Calor gas dealer.
As long as you keep up with cleaning your barbecue regularly, you won’t require as much elbow grease as you would doing one big clean before BBQ season. Keep it in good condition and you’ll save yourself a lot of time and effort!


